Search Archive

Avic F500BT Installed in the dashboard

By vladm11 · Aug 13, 2009in General💬 11 posts👁️ 2,230 views
Posted Aug 13, 2009 · 22:55 UTC#1

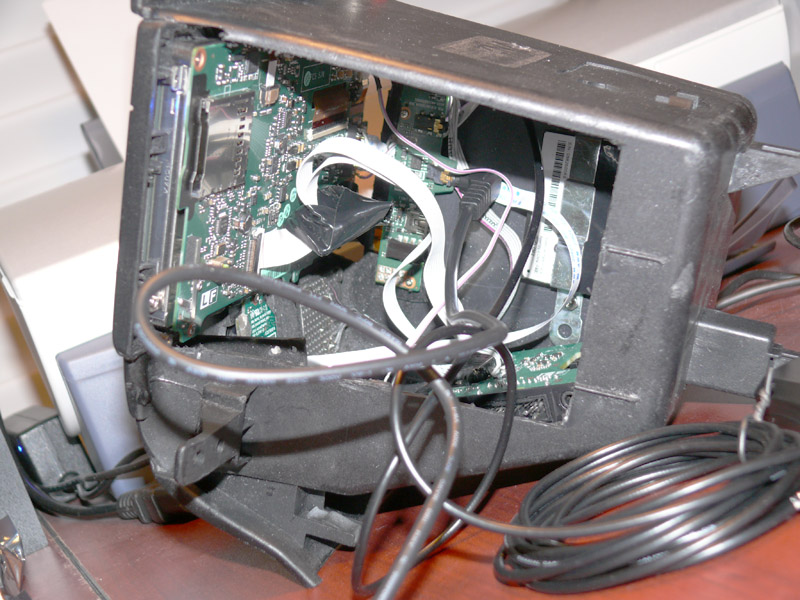
Here is my installation project. I could not fit F900 or F700 with my layout and ended up fabricating and rearranging circuit boards.


The audio out works fine with the stock radio without amplifier, but require a ground loop isolator. I found the internal speaker is loud enough and most of the time I am not even switching my radio to the aux.

Haven't connected the rearview camera since I have one already built in the mirror.

post-36691-1287275849545_thumb.jpg

Posted Aug 14, 2009 · 19:27 UTC#2

Looks good, can you post a close up of the screen controls on the bottom?


Fiberglass, wood, and bondo?

Posted Aug 14, 2009 · 23:13 UTC#3
Looks good, can you post a close up of the screen controls on the bottom?

Following pictures show it better.


Fiberglass, wood, and bondo?

Spare pocket from Honda, Bondo bumper repair kit, plastic pieces, superglue.


Still need to redo the SD card reader. I did not connect the card detection wires and it recognized the card only after reboot.

post-36691-12872758520753_thumb.jpg

post-36691-12872758521984_thumb.jpg

Posted Aug 14, 2009 · 23:50 UTC#4

looks good, that's on a new CRV right?

Posted Aug 15, 2009 · 00:02 UTC#5
looks good, that's on a new CRV right?

No. It is the new Pilot.

Posted Aug 15, 2009 · 00:09 UTC#6
looks good, that's on a new CRV right?

No. It is the new Pilot.


i see, anyways, good job bro,

Posted Aug 17, 2009 · 14:50 UTC#7

when i first read the subject for this thread, i was like oooohhh nnnooooo, not again. but to my surprize it turned out to be awesome. great fab work, it really fits well and looks great, i love it when people are not afraid to open something up and try something new. i knew there was a good reason out there somewhere for pioneer to make the 500


again, great work

Posted Aug 18, 2009 · 08:32 UTC#8

Hello. I am very interested in your project.

I will do something similar in my Honda Accord, and I need to put the buttons on another site, but when I opened the unit and saw that everything is connected with plastic tape, stop the project.

I was amazed to see that you have dismantled the internal plates, but do as you connected again? Have you welded new cables?

I hope you tell me as you have, and if you have photos you would like to show some.

Thank you very much.

Posted Aug 18, 2009 · 12:17 UTC#9
I will do something similar in my Honda Accord, and I need to put the buttons on another site, but when I opened the unit and saw that everything is connected with plastic tape, stop the project.


I was also disapointed when I found that the board with buttons is connected with a proprietary cable. I was expecting one of the standard flat cables. That means you have to keep it connected and keep it close to the original location. In my case I mounted it on the side wall and soldered wires directly to the buttons. I had to create a new circuit board with the new buttons that is mounted below the screen,


As for the central directional control, it is easier. I have got a 250mm ZIF ribbon cable from e-bay. It is wider than needed, but can be cut to the exact width.


The battery connection also needed some custom mounting or can be soldered directly to the battery. I've used some contacts from the old phone to create a new mounting.

The cradle connection is soldered directly to the contacts with a flat cable.


I don't have more pictures to show, but I can send you the one I posted with full resolution that you can see more details.

Posted Aug 18, 2009 · 15:57 UTC#10

Nice! Thats a really clean looking install. Im jealous!

Posted Aug 18, 2009 · 23:12 UTC#11

Oooh, some more photos would have been great. :?

Thanks anyway.

But I do not understand what the buttons solding directly, or Ebay cable.

There are many contacts between a plate and another, and I do not see that it is easy to solder wire separately ...

The photo to the higher resolution ok. :wink: