

AdamOutler
-
Content Count
70 -
Joined
-
Last visited
Content Type
Profiles
Forums
Blogs
Gallery
Posts posted by AdamOutler
-
-
He said password stored in flash, not in SD card. How CPU can access SD card to read password without having SD card password?
I thought SDCard was the flash on this device. There is a second storage?
-
On the SDCard image. please check these locations "0x250000 (and 0x260000)". When opened with a Hex Editor, you should see " a bunch of zeroes … and a 16-byte ASCIIstring hiding there. This is our password." https://fail0verflow.com/blog/2014/enhancing-the-avic-5000nex.html
-
Very good work. that's the entire android system, there. We just need a fool-proof way to recover devices. If you can figure out how to deodex your SYSTEM.img (/system/framework and /system/app), and test it to verify your device boots up properly, I can rewrite the code to remove the warning screen.
@AdamOutler here is an SDCard part on Pioneer's site that is supposed to the the 8100. http://parts.pioneerelectronics.com/part.asp?productNum=CXX7606
If we can get the sdcard password, I could then get image my sdcard (from an 8000 but should work since they can update each other) and hand off.
Did the SDCard from the 5000 not work?
I ordered this SDCard. it's on back order. I requested that it come without encryption/sdcard lock in the special requests field. They obviously need to make new ones anyway, maybe they could just not lock the SDCard before sending it.
I'd hope I don't have to send my device out for JTAG. I have something lined up, but it's expensive and I'm not earning money on this.
-
I can't get my device working without an 8100 SDCard and it's just not proper to RMA the device. I'm really hoping an employee with access to the raw SD Image is reading this and can help. I can keep things anonymous.
I'm also exploring JTAG but I've really screwed with the firmware on my unit so JTAGing a broken firmware will only get us so far and won't allow me to restore my device.If it comes to JTAG, does someone have an x1xx unit or SDCard I can use to pull a pristine 8gb image?
-
This thread is really a bit like an unhealthy relationship... you get your hopes up that everything will be great, and then it doesn't work out. Then you wait, rinse and repeat...

Just needs more time and effort. I spent all weekend analyzing firmware and trying to get my bricked deck working. Once I'm able to get my device working again, custom firmwares should be simple.
-
Is there a trick to get mkbootimg to work?
I am using a Ubuntu 14 virtual box but keep getting a no such file or directory with mkboot, when I try to repack. If I can get past this I think I can get the script together to recompile the boot.prg
use tab auto-complete, be outside of the ramdisk dir, make sure all tools are chmodded +x (executable), and specify full paths.
/path/to/mkbootimg_tools/mkboot /path/to/original_boot.img /path/to/root/of/unpacked/ramdisk_folder/ /path/to/new_boot.img
-
Just tried a cross upgrade with the old GPS, Bluetooth and Boot prgs. It still had the same issue with no Bluetooth audio, carplay audio, or android audio.
I have been unable to get the mkboot tools to work on OS X so I have been unable atm to rebuild a new kernel.
Got VirtualBox, or MacPorts? Either one should be able to do it. VirtualBox would be preferable to run Ubuntu in a VM and you can share a folder between the computer and the VM.
I won't ever be able to get x0xx logs on my device. This weekend I'm going to make a full SD from the x0xx upgraded to x1xx. I hope to restore my bricked device back to operations.
-
The kernel is the layer where the drivers are initialized. Try changing the boot.img as well.Also just tried a cross-upgrade with the old GPS prg and the GPS ver file. It upgraded but still no bluetooth audio.
If that doesn't work we will need to get debugging info. After decompressing the ramdisk, in the init.rc, somewhere late in the boot, place this..
sleep 60 && dmesg>> /storage/sdcard0/log.txt &
Which will cause the system to wait 60 seconds on a background process, then write the kernel log to the external sd. You can paste it on http://code.casual-dev.com
You will have to recompress the kernel using the same tool, then sign it and flash it.
-
Happy to try that but I am unsure which PRG contains the kernel and ramdisk partitions.
btw... external SD is /storage/sdcard0
-
Here's how to extract the boogimg.cfg, the zImage and the initrd.imgHappy to try that but I am unsure which PRG contains the kernel and ramdisk partitions.
#remove headers and create standard boot.img files
dd if=AVICE5100NEX/BOOT/PJ150BOT.PRG skip=1  of=/home/adamoutler/Desktop/boot.img
dd if=AVICE5100NEX/RECOVERY/PJ150REC.PRG skip=1  of=/home/adamoutler/Desktop/recovery.img
cd /home/adamoutler/Desktop
abootimg -x boot.img
first things first, in the bootimg.cfg, make "bootsize = 0x416800" blank so it should be "bootsize =" then save the file.Now lets get into the image. You'll need the mkbootimg tools from here https://builds.casual-dev.com/index.php?dir=random%2FAVIC%2F
adamoutler@adamoutler-desktop:~/Desktop$ kernelwork/mkbootimg_tools/mkboot ./boot.img ./newUnpack & decompress ./boot.img to ./new kernel : /home/adamoutler/Desktop/new/zImage ramdisk : /home/adamoutler/Desktop/new/ramdisk.gz page size : 2048 kernel size : 4095984 ramdisk size : 187481 base : 0x10800000 kernel addr : 0x10808000 ramdisk addr : 0x11800000 second_addr : 0x11700000 tags addr : 0x10800100 cmd line : console=ttymxc0,115200 init=/init video=mxcfb0:dev=ldb,bpp=32 video=mxcfb1:off video=mxcfb2:off fbmem=10M vmalloc=400M androidboot.console=ttymxc0 androidboot.hardware=freescaleramdisk is gzip format.Unpack completed.adamoutler@adamoutler-desktop:~/Desktop$ cd newadamoutler@adamoutler-desktop:~/Desktop/new$ lsimg_info ramdisk ramdisk.gz zImageadamoutler@adamoutler-desktop:~/Desktop/new$ cd ramdisk/adamoutler@adamoutler-desktop:~/Desktop/new/ramdisk$ lsdata init.freescale.rc init.trace.rc systemdefault.prop init.freescale.usb.rc init.usb.rc ueventd.freescale.rcdev init.goldfish.rc proc ueventd.goldfish.rcfstab.freescale init.km500.rc sbin ueventd.rcinit init.rc sysadamoutler@adamoutler-desktop:~/Desktop/new/ramdisk$
And that should get things started.
Thanks. I'm mirroring that here: https://builds.casual-dev.com/index.php?dir=random%2FAVIC%2FLink to this image is in your PM, I think that this image will greatly help.
-
Also just tried a cross-upgrade with the old GPS prg and the GPS ver file. It upgraded but still no bluetooth audio.
Use the old kernel and the old BT partitions. They would need to be resigned. If you can resign a kernel, I can work on some things that will allow us to log to the SDCard. After you remove the header from the kernel you can use a tool to separate the kernel, ramdisk, and kernel parameters. Then the ramdisk can be mounted and we can see what's going on. I'd like to add in a "dmesg>/extsdcard/log.txt or something to the /init.rc file . I don't know what the partitions look like just yet but we could get a better idea from the recovery's /etc/recovery.fstab, or the normal fstab on the boot partition. The easyrecovery appears to be a boot.img format as well. Either way we need logs and this is how we get it. I'd know a lot more about how to attack this if I had the full SDCard image.
-
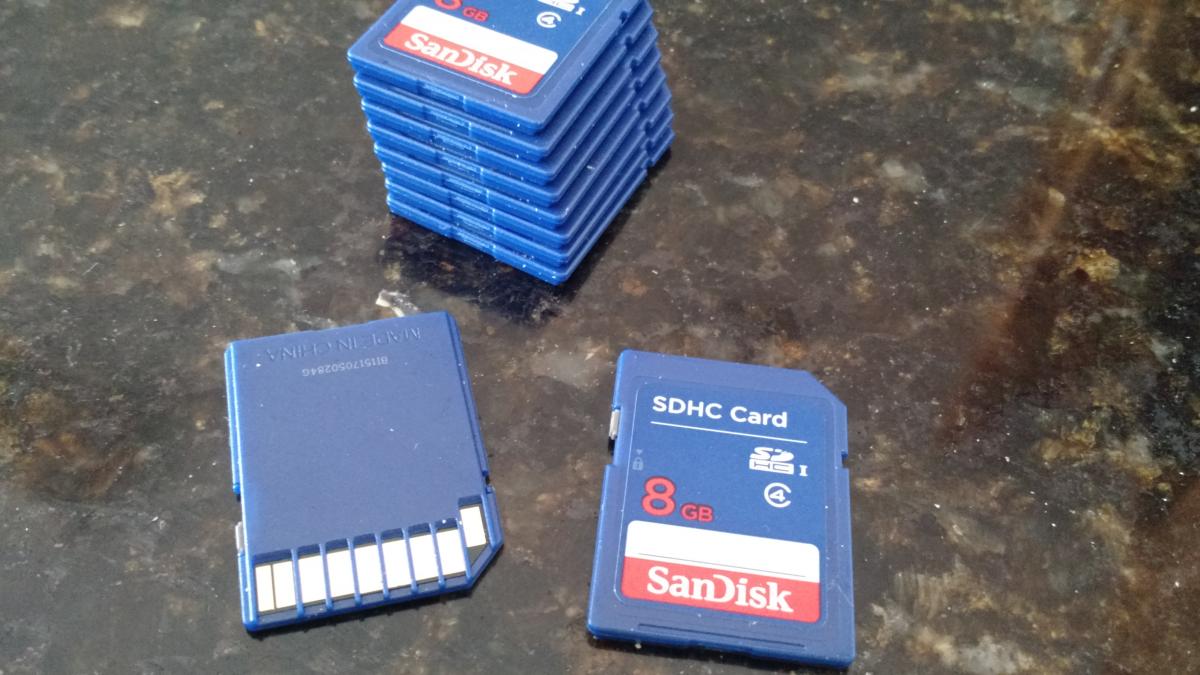
I just picked up 10 sdcards so I would be able to make 10 different custom ROMs. I need the original unencrypted SDCard image.

-
Something we are missing here is a map.. I'm using a 150version (x1xx series) firmware. I will ignore the version. I'm trying to create the start of a scatter chart here. Add more information as it is discovered... Actual partition names, locations in /dev/block, EMMC layouts.. that sort of thing. Eventually we will blow this thing wide open for modification, but we have to start by mapping it out.
common name - associated ver file - location in update
boot.img - BOT.VER - BOOT/BOT.PRG
bootloader - BTL.VER - n/a
UNKNOWN - BT.VER GPS/GPS.PRG
userdata - DAT.VER - USERDATA/DAT.PRG
UNKNOWN - DTV.VER - DTV/DTV.PRG
UNKNOWN - ERY.VER - RECOVERYEASY/ERY.PRG
UNKNOWN - GPS.VER - GPS/GPS.PRG
UNKNOWN - OPN.VER - PG150OPN/OPN.PRG
system.img - PLT.VER - PLATFORM/PLT.PRG
recovery.img - REC.VER - RECOVERY/REC.PRG
UNKNOWN - WWR.VER - WWR/WWR.PRG
UNKNOWN - SNAPSHOT.VER SNAPSHOT/SNAPSHOT.PRG
HIBENDIR HIBENDIR (Special partition)
The update apparently has unused files in the BLUETOOTH folder. BTHBTL.PRG, BTHSAF.PRG, and BTHUDP.PRG
Now, for you "x0xx" people.. Please direct your attention to the BT and GPS lines. Apparently the same image is placed on the BT and GPS... which would explain why BT stops working on your system after flashing the image. We need to get the old BT image emplaced.
I am downloading the sdcard now. I haven't had time to work with it yet. I've got 10 8-gb SDs on order from amazon for $5 each. They should be here on Sunday (according to tracking).
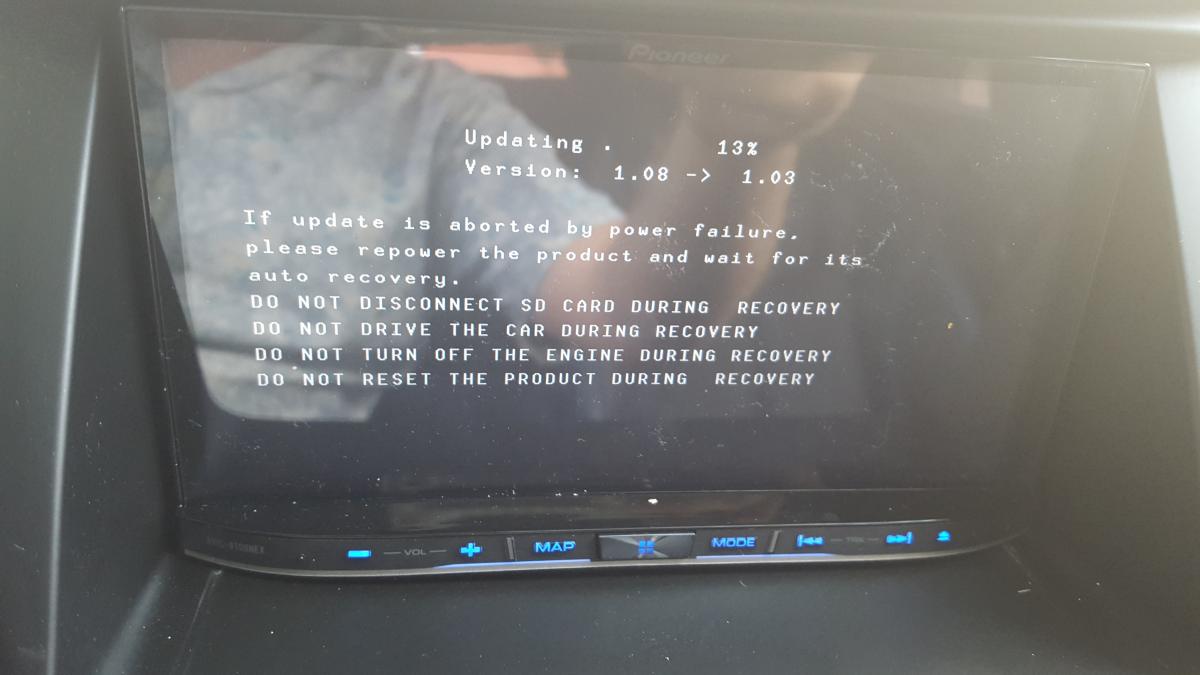
I was looking at the information to figure out why, after upgrading my NEX8100 from 1.03>1.03, the next time it said 1.08>1.03. Some data on the device must have been overwritten with improper versioning. So lets look at the image header..
defaultheader="00010801010000000100000000000000504A313430504C5402100000FFFFFFFFFFFFFFFFFFFFFFFFFFFFFFFFFFFFFFFFFFFFFFFFFFFFFFFFFFFFFFFFFFFFFFFFFFFFFFFFFFFFFFFFFFFFFFFFFFFFFFFFFFFFFFFFFFFFFFFFFFFFFFFFFFFFFFFFFFFFFFFFFFFFFFFFFFFFFFFFFFFFFFFFFFFFFFFFFFFFFFFFFFFFFFFFFFFFFFFFFFFFFFFFFFFFFFFFFFFFFFFFFFFFFFFFFFFFFFFFFFFFFFFFFFFFFFFFFFFFFFFFFFFFFFFFFFFFFFFFFFFFFFFFFFFFFFFFFFFFFFFFFFFFFFFFFFFFFFFFFFFFFFFFFFFFFFFFFFFFFFFFFFFFFFFFFFFFFFFFFFFFFFFFFFFFFFFFFFFFFFFFFFFFFFFFFFFFFFFFFFFFFFFFFFFFFFFFFFFFFFFFFFFFFFFFFFFFFFFFFFFFFFFFFFFFFFFFFFFFFFFFFFFFFFFFFFFFFFFFFFFFFFFFFFFFFFFFFFFFFFFFFFFFFFFFFFFFFFFFFFFFFFFFFFFFFFFFFFFFFFFFFFFFFFFFFFFFFFFFFFFFFFFFFFFFFFFFFFFFFFFFFFFFFFFFFFFFFFFFFFFFFFFFFFFFFFFFFFFFFFFFFFFFFFFFFFFFFFFFFFFFFFFFFFFFFFFFFFFFFFFFFFFFFFFFFFFFFFFFFFFFFFFFFFFFFFFFFFFFFFFFFFFFFFFFFFFFFFFFFFFFFFFFFFFFFFFFFFFFFFFFFFFFFFFFFFFFFFFFFFFFFFFFFFFFFFFFFFFFFFFFFFFFFFFFFFFFFFFFFFFFFFFFFFFFFFFFFFFFFFFFFFFFFFFFFFFFFFFFFFFFFFFFFFFFFFFFFFFFFFFFFFFFFFFFFFFFFFFFFFFFFFFFFFFFFFFFFFFFFFFFFFFFFFFFFFFFFFFFFFFFFFFFFFFFFFFFFFFFFFFF"
The key here is this string of characters "50 4A 31 34 30 50 4C 54". This is hex for PJ140PLT which is the versioning information. PJ140 is the Pioneer platform J version 140, and the PLT partition. Each partition has its own 3-letter identifier.
defaultheaderver="A55A5AA5C00000000001080101000000010000002C000000FFFFFFFFFFFFFFFFFFFFFFFFFFFFFFFFFFFFFFFF010000000100000050004C004100540046004F0052004D000000000000000000000000000000000000000000000000000000000000000000000000000000000000000000000000000100000050004A0031003400300050004C0054002E005000520047000000000000000000000000000000000000000000000000000000000000000000"
The same style of information is in this, but I believe it contains the 1.08 right here... 540046004F0052004D
I'm still trying to figure out why my deck was bricked by that last update. I'm waiting on SDCards. I'm downloading the SD Image currently. I'm still looking at the firmware. I have a wife and kids and full time job as well, so I don't have a ton of time but I will keep this updated.
@bass_rock, any chance you could make an update to the script to handle resigning various partitions? Currently PLT is hardcoded. I'd like it if, when you get a chance, you could update to handle any partition through update. We need, maybe a set of scripts or, something that would handle rewriting any sort of image.. So that way our "x0xx" image buddies can play with "x1xx" versions after we figure out the differences in the SDCard.
-
Sorry. I don't know. My unit (F960BT) is 8 (!!!) months in authorized service
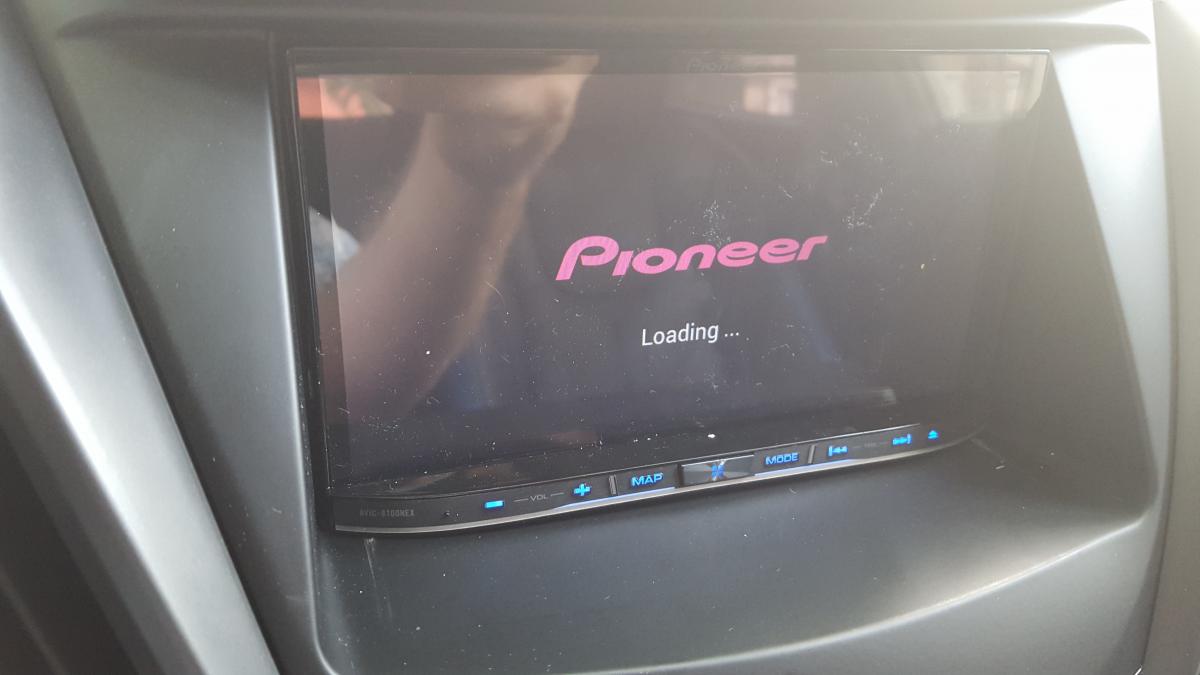
So if I get my device, I'll test uploading modified firmware also.OK. I really need that SD now. I've bricked my device. After deodex, for some reason it said it was upgrading to a different version. Now it just sits at pioneer loading screen.

-
Sorry. I don't know. My unit (F960BT) is 8 (!!!) months in authorized service
So if I get my device, I'll test uploading modified firmware also.Thanks. I tried downloading that torrent in the hopes I could rebuild with the update. No luck. It can't even find a single source for download. Any chance you could upload it somewhere? I could set up an ftp at adamoutler.com or casual-dev.com if you'd like.
Currently I'm deodexing the system/app and system/framework. I will then package it all back up, test and upload somewhere.
The deodexing is important because it combines the .odex and the .apk to make a full app. If you don't deodex, you end up with only part of the app when you decompile the apk. Apparently people only do this on Windows.. I can't find a Linux tool. So I've got my dual-core laptop chugging away on this task until its done. After that, we should be able to use any number of tools to decompile and recompile.
-
Internal SDCard images are also available on torrents sites. I have downloaded avic_5000nex_sd.img image.
c0cfa13514587e7ea2a99358aed67f2d *avic_5000nex_sd.img
f99aacce6347d2c4835fa63b413ed198f0b7fb92 ?SHA1*avic_5000nex_sd.img
e8c49517cd85565343331f7c4282ee3764c484bfb41244f111b0092b98c186b2 ?SHA256*avic_5000nex_sd.img
As I said before, contents of testmode_n.key, testmode_s.key and testmode_a.key for external sd-card/usb is also available. It is possible to enter recovery update modes and test modes using this files.Thank you ever so much. I need an AVIC-8100NEX image though. Any chance you know of one for the x1xxNEX series?
-
I got around to testing. I took the stock update and ran the above script with
/AVIC.sh /home/adamoutler/Downloads/15MY_FW-Update_v1.03_16G_20150318\ \(2\).zip 5100 150
I then copied the resulting AVIC5100NEX folder to an SDCard and popped it into the radio. The update took just fine.
I was not able to connect Android Auto (which depends on bluetooth) after the update and multiple restarts of the phone and head unit. I held the pin-hole reset button for 5-seconds, the HU rebooted and Android Auto connected. Now I'm going to work on the stinkin' start up screen.
Verified: headers on 8100 are the same as the 5000.
-
Hey guys, I'm Adam Outler. I'm new here. I'm pretty well known on the XDA-Developers forums and I'm interested in working on this platform. I own two AVIC-8100NEX units. One is on my bench and the other is in my car. I posted quite a bit of information the other day before I found this post.
I'm very saddened by the lack of communication on this forum. People are making progress independently without sharing any changes or methodologies. I'd like to (without overstepping my bounds) encourage people to post cool new hacking techniques in the relevant forums. You see, without sharing the how of your work, noone can learn anything. If noone learns anything, noone can reproduce your work. If noone can reproduce your work, then the product suffers from lack of development. If the product suffers, you suffer.
So, if I am bringing one bit of the XDA-Developers spirit with me, that's the GPL. Not the GPL itself, but the spirit of the GPL.
Remember that anything you do to the firmware on this unit is not your own work. There were developers at Pioneer who came before you and did the work. You're undoing their work so you can add a few lines of code. You owe it to the developers and the community to share it.
For those curious or with development experience, I just created a shell script that opens up the PRG file, waits for modifications and then merges it back together with the correct CRC32 checks and sizes. It is located here: https://gist.github.com/bassrock/8053d22493785b92958f
The only issue is it uses ext4fuse which is read-only, so just change that to whatever ext4 mounting program you have that allows write access and then code away.I updated the gist to instead use http://www.paragon-software.com/home/extfs-mac/ which has write support.
I've heavily modified your work to operate on Linux. I've also added a license header which is desperately needed on these forums. I want to ensure anything based on your/my work is propagated and anyone who uses it is forced to "pay it forward".
I made the assumption that the headers on the 5000 are the same as the 5100 and therefore the 8100 as well, because the firmware is apparently compatible as per post #1 in this thread, and the fact that the 5100NEX firware is used on the 8100. Is this correct? If so, then this should work properly.
Workflow:
- On a Linux computer, copy this to a file called AVIC.sh
- download a firmware update
- run
"AVIC.sh /path_to/MY_FW-update.zip".
If you're not using AVIC5000, you can add in the Model and Version parameters. So a model avic8100-NEX with version pj150plt.prg would be"AVIC.sh /path_to/MY_FW-update.zip 8100 150"
- The script will tell you where it mounted the image file. Modify it utilizing methods available on xda-developers.com for creating custom ROMs.
- Press any key to continue, and it will repackage the ROM utilizing methods by bass-rock
#! /bin/bash
# AVIC.sh - Unpacks SYSTEM.img from the AVIC firmware for modification, waits for an input, then repackages.

# THIS FILE AND DERRIVITIVE WORKS ARE SUBJECT TO ALL TERMS OF LICENSING BELOW!
# License:
# Term 0: If you modify this file, you must share any changes with the file creators and/or publicly on AVIC411.com
# Term 1: If you find a new use, share changes on AVIC411.com
# Term 2: If it worked say thanks.
# Term 3: IF anyone claims this is black magic, I'm going to flip.

# By bass_rock http://avic411.com/index.php?/user/116652-bass-rock/
# Heavily modified by AdamOutler adamoutler@gmail.com
# http://avic411.com/index.php?/topic/80945-upgrading-nex4000-to-nex4100-work-in-progress/page-19#entry332704


#this function is called when system is not Linux, user is not root, or user did not specify a file
usage() {
  echo "usage:"
  echo "  AVIC.sh /path_to/firmware.zip [AVIC Model] [AVIC firmware version]"
  echo "where AVIC Model = 5000, or 8100"
  echo "where AVIC firmware version = 140 or 150"
  exit
}

#exit on any error
set -e

#verify system is Linux and user is root and specifed a file
test "$(uname)" = "Linux" || $(echo "this only works on linux" && usage)
test $(id -u) -eq "0" || $(echo "you must run as root" && usage)
test -z "$1" && $(echo "you must specify a file"&& usage)

#set variables for use (default AVIC-5000NEX, Version 140)
AVICZIP="$1"
m=$2
model=${m:="5000"}
v=$3
version=${v:="140"}

#create absolute paths for reference
workdir=$(pwd)"/work"
imageDir="$workdir/AVIC${model}NEX/PLATFORM"
SYSTEMmount="$workdir/AVIC${model}NEX/PLATFORM/SYSTEM"

#set up file and extract properly
mkdir -p $workdir/
unzip -o "$AVICZIP" -d $workdir/
cd "$imageDir"

#remove header from image
dd if=PJ${version}PLT.PRG of=PJ${version}PLT.IMG bs=512 skip=1
dd if=PJ${version}PLT.PRG of=PJ${version}PLT.HEADER bs=512 count=1

#ignore errors while we create a new folder for working with image
set +e
umount "$SYSTEMmount" 2>&1
test -e "$SYSTEMmount" && rm -rf "$SYSTEMmount"
mkdir $SYSTEMmount
set -e

#mount the image
mount PJ${version}PLT.IMG "$SYSTEMmount"

echo "You can now modify the img located in"
echo "$SYSTEMmount"
read -n 1 -p "Press any key to continue" isdone

sync #ensure all changes are written to disk
defaultheader="00010801010000000100000000000000504A313430504C5402100000FFFFFFFFFFFFFFFFFFFFFFFFFFFFFFFFFFFFFFFFFFFFFFFFFFFFFFFFFFFFFFFFFFFFFFFFFFFFFFFFFFFFFFFFFFFFFFFFFFFFFFFFFFFFFFFFFFFFFFFFFFFFFFFFFFFFFFFFFFFFFFFFFFFFFFFFFFFFFFFFFFFFFFFFFFFFFFFFFFFFFFFFFFFFFFFFFFFFFFFFFFFFFFFFFFFFFFFFFFFFFFFFFFFFFFFFFFFFFFFFFFFFFFFFFFFFFFFFFFFFFFFFFFFFFFFFFFFFFFFFFFFFFFFFFFFFFFFFFFFFFFFFFFFFFFFFFFFFFFFFFFFFFFFFFFFFFFFFFFFFFFFFFFFFFFFFFFFFFFFFFFFFFFFFFFFFFFFFFFFFFFFFFFFFFFFFFFFFFFFFFFFFFFFFFFFFFFFFFFFFFFFFFFFFFFFFFFFFFFFFFFFFFFFFFFFFFFFFFFFFFFFFFFFFFFFFFFFFFFFFFFFFFFFFFFFFFFFFFFFFFFFFFFFFFFFFFFFFFFFFFFFFFFFFFFFFFFFFFFFFFFFFFFFFFFFFFFFFFFFFFFFFFFFFFFFFFFFFFFFFFFFFFFFFFFFFFFFFFFFFFFFFFFFFFFFFFFFFFFFFFFFFFFFFFFFFFFFFFFFFFFFFFFFFFFFFFFFFFFFFFFFFFFFFFFFFFFFFFFFFFFFFFFFFFFFFFFFFFFFFFFFFFFFFFFFFFFFFFFFFFFFFFFFFFFFFFFFFFFFFFFFFFFFFFFFFFFFFFFFFFFFFFFFFFFFFFFFFFFFFFFFFFFFFFFFFFFFFFFFFFFFFFFFFFFFFFFFFFFFFFFFFFFFFFFFFFFFFFFFFFFFFFFFFFFFFFFFFFFFFFFFFFFFFFFFFFFFFFFFFFFFFFFFFFFFFFFFFFFFFFFFFFFFFFFFFFFFFFFFFFFFFFFFFFFFFFFFFFFFFFFFF"

#get image size
# for mac
# SIZE="$(stat -f%z PJ${version}PLT.IMG)"
#for linux
SIZE="$(stat -c%s PJ${version}PLT.IMG)"
echo "IMG size is: $SIZE"

#We have to swap the hex values from big endian to little endian cause the NEX is arm.
UNSWAPPEDHEXSIZE="$(printf '%x\n' $SIZE)"
vSIZE="$UNSWAPPEDHEXSIZE"
SWAPPEDHEXSIZE="${vSIZE:6:2}${vSIZE:4:2}${vSIZE:2:2}${vSIZE:0:2}"
UNSWAPPEDHEXCRC="$(crc32 PJ${version}PLT.IMG)"
vCRC="$UNSWAPPEDHEXCRC"
SWAPPEDHEXCRC="${vCRC:6:2}${vCRC:4:2}${vCRC:2:2}${vCRC:0:2}"

echo "Unswapped size hex is: $UNSWAPPEDHEXSIZE"
echo "Swapped size hex is: $SWAPPEDHEXSIZE"
echo "Unswapped crc hex is: $UNSWAPPEDHEXCRC"
echo "Swapped crc hex is: $SWAPPEDHEXCRC"

#create new header
perl -e "print pack 'H*', 'A55A5AA5${SWAPPEDHEXSIZE}${SWAPPEDHEXCRC}${defaultheader}'" > PJ${version}PLT.HEADERNEW
cat PJ${version}PLT.HEADERNEW PJ${version}PLT.IMG > PJ${version}PLT.PRG
rm -rf PJ${version}PLT.IMG
rm -rf PJ${version}PLT.HEADERNEW
defaultheaderver="A55A5AA5C00000000001080101000000010000002C000000FFFFFFFFFFFFFFFFFFFFFFFFFFFFFFFFFFFFFFFF010000000100000050004C004100540046004F0052004D000000000000000000000000000000000000000000000000000000000000000000000000000000000000000000000000000100000050004A0031003400300050004C0054002E005000520047000000000000000000000000000000000000000000000000000000000000000000"
SIZE="$(stat -c%s PJ${version}PLT.PRG)"
echo "PRG size is: $SIZE"
UNSWAPPEDHEXSIZE="$(printf '%x\n' $SIZE)"
vSIZE="$UNSWAPPEDHEXSIZE"
SWAPPEDHEXSIZE="${vSIZE:6:2}${vSIZE:4:2}${vSIZE:2:2}${vSIZE:0:2}"
UNSWAPPEDHEXCRC="$(crc32 PJ${version}PLT.PRG)"
vCRC="$UNSWAPPEDHEXCRC"
SWAPPEDHEXCRC="${vCRC:6:2}${vCRC:4:2}${vCRC:2:2}${vCRC:0:2}"

echo "Unswapped prg size hex is: $UNSWAPPEDHEXSIZE"
echo "Swapped prg size hex is: $SWAPPEDHEXSIZE"
echo "Unswapped prg crc hex is: $UNSWAPPEDHEXCRC"
echo "Swapped prg crc hex is: $SWAPPEDHEXCRC"


perl -e "print pack 'H*', '${defaultheaderver}${SWAPPEDHEXSIZE}${SWAPPEDHEXCRC}A55A5AA5'" > PJ${version}PLT.VERSTART

UNSWAPPEDHEXCRC="$(crc32 PJ${version}PLT.VERSTART)"
vCRC="$UNSWAPPEDHEXCRC"
SWAPPEDHEXCRC="${vCRC:6:2}${vCRC:4:2}${vCRC:2:2}${vCRC:0:2}"
echo "Unswapped verstart crc hex is: $UNSWAPPEDHEXCRC"
echo "Swapped verstart crc hex is: $SWAPPEDHEXCRC"

perl -e "print pack 'H*', '${SWAPPEDHEXCRC}'" > PJ${version}PLT.VERSTART1

cat PJ${version}PLT.VERSTART PJ${version}PLT.VERSTART1 > PJ${version}PLT.VER
rm -rf PJ${version}PLT.VERSTART
rm -rf PJ${version}PLT.VERSTART1
cd "$workdir"
umount "$SYSTEMmount"
test -e "$SYSTEMmount" && rm -rf "$SYSTEMmount"
This script will produce an output like this:
root@adamoutler-desktop:/home/adamoutler/Desktop/pioneer/8053d22493785b92958f# ./AVIC.sh  /home/adamoutler/Downloads/15MY_FW-Update_v1.03_16G_20150318\ \(2\).zip 5100 150
Archive:  /home/adamoutler/Downloads/15MY_FW-Update_v1.03_16G_20150318 (2).zip
  inflating: /home/adamoutler/Desktop/pioneer/8053d22493785b92958f/work/AVIC5100NEX/BLUETOOTH/PJ150BTHBTL.PRG
  inflating: /home/adamoutler/Desktop/pioneer/8053d22493785b92958f/work/AVIC5100NEX/BLUETOOTH/PJ150BTHSAF.PRG
  inflating: /home/adamoutler/Desktop/pioneer/8053d22493785b92958f/work/AVIC5100NEX/BLUETOOTH/PJ150BTHUDP.PRG
  inflating: /home/adamoutler/Desktop/pioneer/8053d22493785b92958f/work/AVIC5100NEX/BOOT/PJ150BOT.PRG
  inflating: /home/adamoutler/Desktop/pioneer/8053d22493785b92958f/work/AVIC5100NEX/DTV/PJ150DTV.PRG
  inflating: /home/adamoutler/Desktop/pioneer/8053d22493785b92958f/work/AVIC5100NEX/GPS/PJ150GPS.PRG
  inflating: /home/adamoutler/Desktop/pioneer/8053d22493785b92958f/work/AVIC5100NEX/HIBENDIR/HIBENDIR.PRG
  inflating: /home/adamoutler/Desktop/pioneer/8053d22493785b92958f/work/AVIC5100NEX/HIBENDIR.VER
  inflating: /home/adamoutler/Desktop/pioneer/8053d22493785b92958f/work/AVIC5100NEX/PJ150BOT.VER
  inflating: /home/adamoutler/Desktop/pioneer/8053d22493785b92958f/work/AVIC5100NEX/PJ150BT.VER
  inflating: /home/adamoutler/Desktop/pioneer/8053d22493785b92958f/work/AVIC5100NEX/PJ150BTL.VER
  inflating: /home/adamoutler/Desktop/pioneer/8053d22493785b92958f/work/AVIC5100NEX/PJ150DAT.VER
  inflating: /home/adamoutler/Desktop/pioneer/8053d22493785b92958f/work/AVIC5100NEX/PJ150DTV.VER
  inflating: /home/adamoutler/Desktop/pioneer/8053d22493785b92958f/work/AVIC5100NEX/PJ150ERY.VER
  inflating: /home/adamoutler/Desktop/pioneer/8053d22493785b92958f/work/AVIC5100NEX/PJ150GPS.VER
  inflating: /home/adamoutler/Desktop/pioneer/8053d22493785b92958f/work/AVIC5100NEX/PJ150OPN/PJ150OPN.PRG
  inflating: /home/adamoutler/Desktop/pioneer/8053d22493785b92958f/work/AVIC5100NEX/PJ150OPN.VER
  inflating: /home/adamoutler/Desktop/pioneer/8053d22493785b92958f/work/AVIC5100NEX/PJ150PLT.VER
  inflating: /home/adamoutler/Desktop/pioneer/8053d22493785b92958f/work/AVIC5100NEX/PJ150REC.VER
  inflating: /home/adamoutler/Desktop/pioneer/8053d22493785b92958f/work/AVIC5100NEX/PJ150WWR.VER
  inflating: /home/adamoutler/Desktop/pioneer/8053d22493785b92958f/work/AVIC5100NEX/PLATFORM/PJ150PLT.PRG
  inflating: /home/adamoutler/Desktop/pioneer/8053d22493785b92958f/work/AVIC5100NEX/RECOVERY/PJ150REC.PRG
  inflating: /home/adamoutler/Desktop/pioneer/8053d22493785b92958f/work/AVIC5100NEX/RECOVERYEASY/PJ150ERY.PRG
  inflating: /home/adamoutler/Desktop/pioneer/8053d22493785b92958f/work/AVIC5100NEX/SNAPSHOT/SNAPSHOT.PRG
  inflating: /home/adamoutler/Desktop/pioneer/8053d22493785b92958f/work/AVIC5100NEX/SNAPSHOT.VER
  inflating: /home/adamoutler/Desktop/pioneer/8053d22493785b92958f/work/AVIC5100NEX/USERDATA/PJ150DAT.PRG
  inflating: /home/adamoutler/Desktop/pioneer/8053d22493785b92958f/work/AVIC5100NEX/WWR/PJ150WWR.PRG
1048568+0 records in
1048568+0 records out
536866816 bytes (537 MB) copied, 2.55588 s, 210 MB/s
1+0 records in
1+0 records out
512 bytes (512  copied, 0.192484 s, 2.7 kB/s
umount: /home/adamoutler/Desktop/pioneer/8053d22493785b92958f/work/AVIC5100NEX/PLATFORM/SYSTEM: not found
You can now modify the img located in
/home/adamoutler/Desktop/pioneer/8053d22493785b92958f/work/AVIC5100NEX/PLATFORM/SYSTEM
Press any key to continue

#########Make your changes at this point before hitting any key#############


IMG size is: 536866816
Unswapped size hex is: 1ffff000
Swapped size hex is: 00f0ff1f
Unswapped crc hex is: 9c1d9cf5
Swapped crc hex is: f59c1d9c
PRG size is: 536867328
Unswapped prg size hex is: 1ffff200
Swapped prg size hex is: 00f2ff1f
Unswapped prg crc hex is: f97384af
Swapped prg crc hex is: af8473f9
Unswapped verstart crc hex is: 86818fcd
Swapped verstart crc hex is: cd8f8186
root@adamoutler-desktop:/home/adamoutler/Desktop/pioneer/8053d22493785b92958f#
I'm still testing this and have not yet tried it. I wanted to document my work so as not to hold up progress from interested parties. I won't have time to test today, but this should help any Linux users to get started.
@bass_rock: this is how to launch an app. https://stackoverflow.com/questions/3872063/launch-an-application-from-another-application-on-android. You would create a button, say 200dip above the SET_OFF button. Then you would create an event listener on the button and have it execute the linked code. I'd say it would be useful to have it launch "com.android.launcher", and if that package doesn't work, then it needs to be added to /system/app.
Does anyone have an example of a properly formatted SDCard? I own a very fast web server which I use for ROM image hosting. Without something to work with, it's going to be difficult to get any sort of custom ROM going here. If the size is the barrier, I can help.
-
I mucked around for about 16 hours this weekend playing with the AVIC 8100 NEX, firmware update, source code, and SD card. I have never worked with Freescale or EasyRecovery so I'm not sure which features to attribute to which manufacturer, or how they work. I'm hoping to start a conversation about this here and maybe pioneer a custom Pioneer Android ROM, which would add some serious value to our devices.
First off, does anyone know the SD CMD42 password for the SDCard?
Overall:
This generation runs Android. The UI is entirely Android. The partitions in the update are standard Android partitions but instead of just boot and recovery, there is a third Linux kernel "boot.img" formatted image for some reason.
Update:
The partitions are signed. Each file in a folder inside the update is a separate whole partition image. They also each have a corresponding version information file in the root dir of the update which point to the folder which they are contained. They contain a header with some information, followed by a series of 0xFF's, then the partition starts.
You can remove the header from the files and you have a mountable partition. Using Linux I was able to mount the SYSTEM and tear apart the boot.img files. It's all standard Android, but I have no idea how to sign them after modification to be used with EasyRecovery.
Source:
The GPL compliance source code is overwhelming. It's not contained in one place. It's a series of patches which go against mainline Android 4.2.2. I'm not sure if it's complete and even if it is, I don't know how to place it onto the device or sign it for EasyRecovery.
Does anyone have some insight? If I could get the SD password, I could do some serious work and start by removing the nag screen on startup, then move on to forcing Android Auto to Auto-play on deck startup. Any ideas?
Upgrading NEX4000 to NEX4100 - Work in Progress
in NEX Series
Posted
The question is how do we get into the U-Boot console http://forum.xda-developers.com/showthread.php?t=1423009
Maybe I should look into this, since console seems to be confirmed. I will probe around this weekend.